
In today’s fast-paced digital world, creating visually stunning 3D models is essential for artists, animators, and designers alike. One of the most effective ways to add realism to your renders is through the use of surface imperfections like scratches. These details can transform a simple model into a realistic piece with character and history. This guide explores how to achieve that in Cinema 4D, employing techniques that apply across popular render engines such as Arnold, Redshift, and Octane.
Understanding Surface Imperfections
Surface imperfections make 3D renders more believable by replicating the natural wear and tear seen in real-life objects. When applied correctly, scratches add depth and complexity, making characters or objects appear lived-in and authentic. Visual artists can utilize various methods and materials to simulate these imperfections effectively.
Setting Up Your Scene in Cinema 4D
To begin crafting your masterpiece, you’ll first want to set up your scene. Here’s a breakdown of the process:
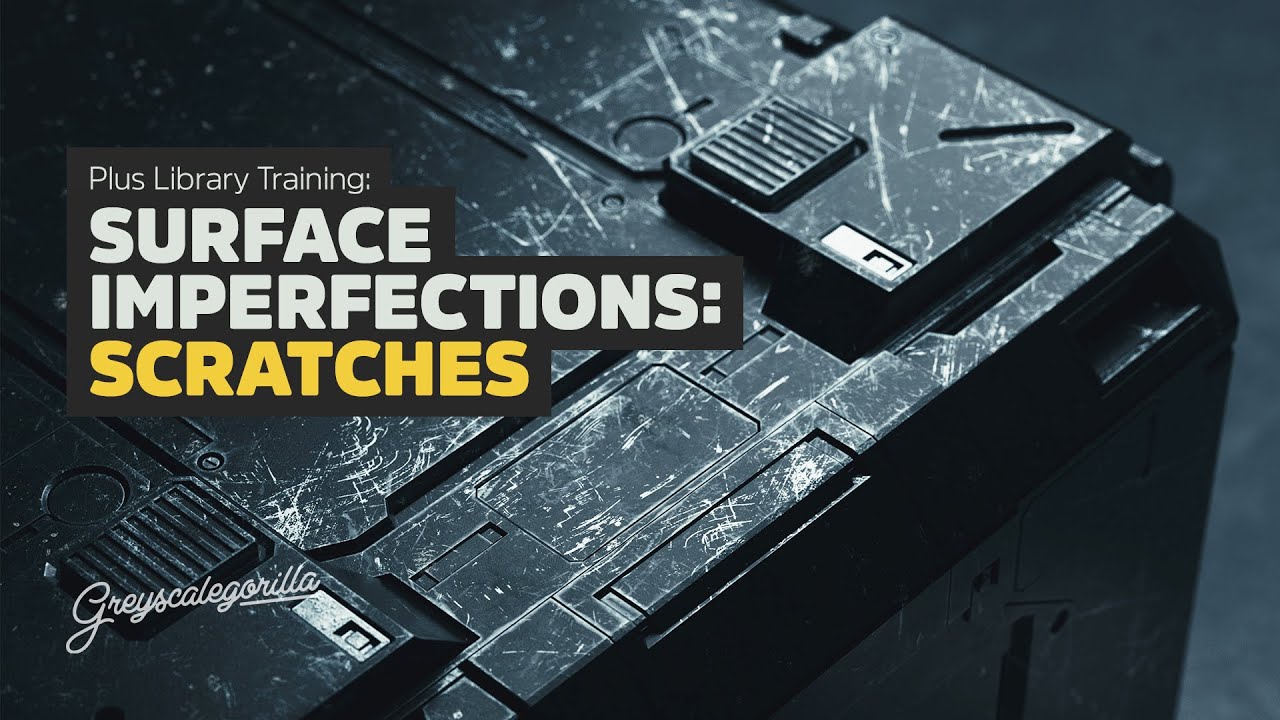
- Model Selection: Start with a basic model. In this scenario, we are using a sci-fi crate.
- Environment Setup: Add a ground plane and use an HDRI for lighting. For this example, EMC’s concrete texture creates a suitable atmosphere.
- Material Application: Apply your materials using mix shaders. For instance, you might layer a painted metal texture over a gunmetal material. This layering will enable the exposure of underlying textures through scratches.
Analyzing Your Materials
In your materials setup, you can dissect the layers as follows:
- Layer 1: A painted metal texture, adjusted to industrial yellow.
- Layer 2: A gunmetal texture to be revealed by the scratches.
Utilize a mix shader to dynamically interact with these layers—allowing the scratched effects to reveal the underlying metal.
Creating Edge Wear and Scratches
Edgewear Techniques
One way to simulate realism is through creating edge wear. This can be accomplished using curvature maps:
- Curvature Map: Employed to determine where wear occurs, usually more prominent on the edges of the model.
- Breaking Uniformity: To prevent the wear from appearing too uniform, combine it with a C4D noise. This adds organic variation to the edgewear.
Adding Scratches
For adding scratches to your model, follow these steps:
- Select a Scratch Texture: From your library, choose an appropriate scratch texture (e.g., Scratch 45).
- Configure Your Nodes: Insert the scratch texture into a tri-planar setup, followed by adding a range node to refine its intensity and appearance. Clamping values will also ensure the scratches fit well within the context of your model.
- Layering Scratches: Place your scratch layer into the layer RGB setup. This will allow scratches to interact with the other materials and create the desired effect.
Fine-Tuning the Scratches
- Adjusting Visibility: By modifying the range nodes and combining additional noise layers, you can control how and where the scratches appear.
- Experimenting with Different Textures: Utilize various scratch textures for added diversity in your presentations. Play with sizing and contrast until the desired level of detail is achieved.
Evaluating Your Final Render
Look and Feel
Once your model features the applied surface imperfections, take a moment to step back and evaluate:
- Lighting Impact: Rotate around the model under different lighting conditions to see how the surface imperfections interact with shadows and highlights.
- Refinement Levels: Decide whether you want a more subtle distribution of scratches or a heavily worn look. This decision will dramatically alter the perceived history of your model, thus affecting its narrative.
Rendering Process
After final adjustments, proceed with your rendering. Export your image once satisfied with the appearance in the close-up and wide shots. Little tweaks can yield significant results, so don’t hesitate to experiment with settings before finalizing your render.
Leveraging Surface Imperfections for Realism
Surface imperfections are undeniably powerful tools in a 3D artist’s arsenal. As illustrated:
- They can be used to enhance roughness and bump maps, adding further detail.
- They also serve to create materials that react uniquely under different lighting scenarios.
- The versatility of using libraries makes it easier to achieve a high standard of realism quickly.
Conclusion
Adding surface imperfections like scratches can significantly enhance the realism of your 3D models. By mastering the techniques outlined in this guide, you can create visually captivating and lifelike renders that resonate with viewers. Whether you’re in animation, motion graphics, or product design, incorporating these elements will undoubtedly elevate your work.
Try integrating surface imperfections into your next project! Watch your models come to life like never before! For additional tips and tricks on enhancing your 3D creations, don’t hesitate to explore further resources online.